
LS2208 Barcode Scanner Manual: A Comprehensive Guide
Welcome! This manual provides detailed instructions for your newly unboxed LS2208, offering in-depth knowledge to quickly and efficiently utilize its full potential.
The LS2208 handheld barcode scanner represents a robust and reliable solution for a wide array of point-of-sale (POS) and light industrial applications. Designed for ease of use and durability, this scanner quickly decodes prevalent barcode symbologies, streamlining operations and enhancing efficiency. This manual serves as a comprehensive resource, guiding you through the setup, operation, and maintenance of your new LS2208 scanner.
Whether you’re implementing it in a retail environment, a warehouse, or a library, the LS2208 is engineered to deliver consistent performance. This guide will equip you with the knowledge to maximize its capabilities, ensuring a smooth integration into your existing workflow. We aim to provide a clear and concise understanding of all features.
What’s in the Box?
Upon opening your LS2208 package, please verify that all the following components are present. Your LS2208 barcode scanner is, of course, the primary item. Alongside the scanner itself, you should find this comprehensive user manual – the document you are currently reading – designed to guide you through every aspect of setup and operation.
Additionally, the box contains a standard USB cable, facilitating a straightforward connection to your computer or POS system. Depending on your purchase configuration, a keyboard wedge cable may also be included, offering an alternative connection method. Please inspect all items for any signs of damage during shipping. If anything is missing or appears damaged, contact customer support immediately for assistance and replacement options.
LS2208 Scanner Key Features
The LS2208 barcode scanner boasts a range of features designed for optimal performance and ease of use. Its key strength lies in its rapid scanning speed, quickly and accurately capturing barcodes to streamline your workflow. The scanner’s durable construction ensures reliability even in demanding environments, resisting wear and tear from daily use.
Furthermore, the LS2208 offers versatile connectivity options, supporting both USB and keyboard wedge interfaces for broad compatibility with various systems. Its intuitive design allows for comfortable handling during extended scanning sessions. The scanner also features a wide field of view, simplifying barcode targeting. Finally, its plug-and-play functionality minimizes setup time, getting you operational quickly.
Setting Up Your LS2208
Let’s begin! This section guides you through the initial setup process, covering unboxing, connection to your system, and powering on the scanner effectively.
Unboxing and Initial Inspection
Carefully unpack your LS2208 barcode scanner from its packaging. Ensure you have all components present, referencing the “What’s in the Box?” section of this manual for a complete list. Visually inspect the scanner for any signs of physical damage incurred during shipping – cracks, dents, or loose parts.
Check the scanner window for cleanliness; remove any protective film. Verify the cable (USB or keyboard wedge, depending on your model) is included and undamaged. Retain the original packaging for potential future returns or warranty claims. If any damage or missing components are discovered, immediately contact the retailer or manufacturer for assistance. Do not attempt to operate a damaged scanner, as this could void your warranty and potentially cause injury.

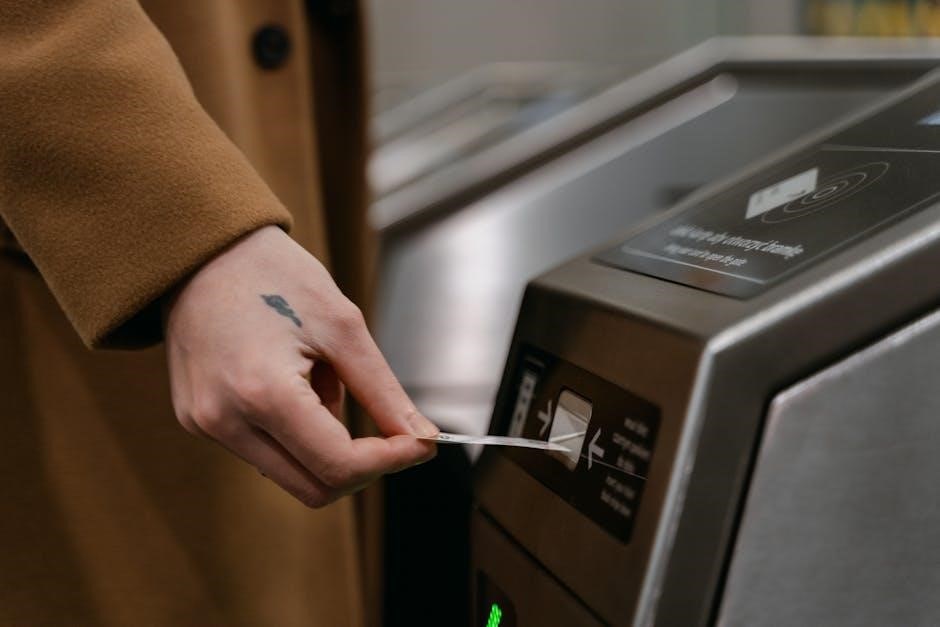
Connecting the Scanner to Your System
Before connecting your LS2208, ensure your system meets the minimum requirements. The scanner supports both USB and Keyboard Wedge interfaces – choose the method compatible with your setup. For USB connection, simply plug the scanner’s USB cable into an available USB port on your computer. The system should automatically detect and install the necessary drivers.
If using Keyboard Wedge, connect the scanner’s cable to your keyboard’s input port. You may need to configure your system to recognize the scanner as a keyboard input device. Refer to the “Keyboard Wedge Connection Guide” for detailed instructions. Ensure the connection is secure to prevent data transmission errors. Once connected, proceed to power on the scanner.
USB Connection Guide
Establishing a USB connection with your LS2208 is straightforward. Locate an available USB port on your computer – USB 2.0 or higher is recommended for optimal performance. Carefully insert the scanner’s USB cable into the port. Upon connection, your operating system should automatically detect the scanner as a new device.
Driver installation is typically automatic; however, if prompted, use the drivers included with the scanner or download the latest version from the manufacturer’s website. Once the drivers are installed, the scanner is ready for use. Verify successful connection by testing the scanner with a barcode. If issues arise, check the cable connection and restart your computer.
Keyboard Wedge Connection Guide
Utilizing the keyboard wedge interface allows the LS2208 to emulate a keyboard, transmitting scanned data directly into any application that accepts keyboard input. Connect the keyboard wedge cable to the designated port on your computer – typically a PS/2 or USB port with a keyboard wedge adapter.
Configuration may be needed within your application to ensure proper data reception. Some systems require enabling “keyboard wedge” mode in the scanner’s settings via barcode configuration codes. Test the connection by scanning a barcode; the data should appear as if typed on the keyboard. If no data appears, verify the cable connection and configuration settings.
Powering On the Scanner
The LS2208 typically receives power directly through the connected interface – USB or keyboard wedge. Once connected, the scanner should power on automatically, indicated by the illumination of the LED indicators and a brief self-test beep. If the scanner doesn’t power on, double-check the cable connection to both the scanner and the host system.
Ensure the host system is powered on and providing sufficient power through the port. Some USB hubs may not provide adequate power. A solid LED generally signifies successful power-up. If the scanner still fails to power on, consult the troubleshooting section for further assistance and potential solutions.

Understanding the LS2208 Interface
The LS2208 utilizes LED indicators and distinct beep codes to communicate its status, providing valuable feedback during operation and troubleshooting processes;
LED Indicators and Their Meanings
The LS2208 barcode scanner employs a series of LED indicators to convey its operational status and potential issues. A solid green LED generally signifies successful power-on and readiness for scanning operations. Conversely, a blinking green LED often indicates that the scanner is actively attempting to decode a barcode, processing the scanned data.
A red LED serves as a warning signal. A solid red light typically denotes a critical error, such as a hardware malfunction or a communication failure with the host system. A blinking red LED might suggest a configuration issue or an inability to read the barcode presented. Understanding these visual cues is crucial for efficient troubleshooting. Refer to the beep code section for complementary diagnostic information, as LED and audio signals often work in tandem to pinpoint the source of any problems encountered during use.
Beep Codes and Troubleshooting
The LS2208 utilizes distinct beep codes to communicate scanner status and aid in troubleshooting. A single short beep confirms a successful scan and data transmission. However, a continuous beeping sound often indicates a read error – the scanner cannot decode the presented barcode. This could stem from poor barcode quality, incorrect scanning distance, or an unsupported symbology;
Multiple short beeps may signal a low power condition, prompting you to check the power supply or connection. If the scanner emits no beep, verify the volume is enabled and the scanner is properly connected. Consult the LED indicator section for correlated visual cues. If issues persist, attempt a factory reset. Remember to consult the manual’s barcode configuration section for advanced troubleshooting options and customization possibilities.
Scanning Techniques & Performance
Maximize efficiency by understanding optimal scanning practices; proper angle and distance are crucial for reliable barcode reading and consistent performance.

Optimal Scanning Distance and Angle
Achieving optimal performance with your LS2208 scanner relies heavily on maintaining the correct scanning distance and angle. Generally, for 1D barcodes, a distance of 2 to 8 inches (5 to 20 cm) yields the best results. For 2D barcodes, slightly closer proximity – between 1 to 6 inches (2.5 to 15 cm) – is often necessary.
The ideal scanning angle is perpendicular (90 degrees) to the barcode. Tilting the scanner excessively can make it difficult to decode the barcode accurately. Experiment with slight adjustments to find the sweet spot for different barcode types and surface finishes. Remember that poorly lit environments or reflective surfaces can impact scanning performance, requiring adjustments to distance and angle for successful reads. Consistent technique ensures reliable data capture.
Reading Different Barcode Types
The LS2208 scanner is engineered to efficiently decode a wide array of barcode symbologies. It excels at reading standard 1D barcodes like UPC, EAN, Code 39, and Code 128, commonly found on retail products and shipping labels. Ensure proper illumination and a clear barcode image for optimal 1D scanning.
If your LS2208 model supports 2D barcodes (like QR codes and Data Matrix), maintain a closer scanning distance and ensure the entire code is within the scanner’s field of view. Some configurations may require enabling 2D scanning via barcode programming codes. Always test with various barcode types to confirm successful decoding and adjust settings as needed for specific applications.
1D Barcode Scanning
For optimal 1D barcode scanning with the LS2208, maintain a distance of 2-8 inches (5-20 cm) between the scanner window and the barcode. A steady, consistent scanning motion across the entire barcode width is crucial. Ensure sufficient ambient light, but avoid direct glare on the barcode surface, which can hinder readability.
Common 1D symbologies like UPC, EAN, Code 39, and Code 128 are readily decoded. If encountering difficulties, verify the barcode quality – damaged or poorly printed barcodes may require closer scanning or a different angle. Adjust the scanner’s angle slightly to find the sweet spot for successful decoding. Proper technique significantly improves scanning speed and accuracy.
2D Barcode Scanning (if applicable)
If your LS2208 model supports 2D barcode scanning, a slightly different technique is required. Maintain a distance of 3-10 inches (7.5-25 cm) from the barcode. Unlike 1D barcodes, 2D barcodes (like QR codes and Data Matrix) require a more stable scanning position; slow, deliberate movements are preferred over rapid sweeps.
Ensure the entire 2D barcode is within the scanner’s field of view. Adequate lighting is even more critical for 2D barcodes. If the scan fails, try rotating the scanner slightly or adjusting the focus. Verify the barcode’s print quality and contrast. Some 2D barcodes may require enabling specific symbologies within the scanner’s configuration settings.
Dealing with Damaged or Poorly Printed Barcodes
Encountering damaged or poorly printed barcodes is common. First, attempt scanning from multiple angles, as slight variations can sometimes allow a successful read. Reduce the scanning distance to approximately 2-4 inches (5-10 cm) for increased focus. Ensure sufficient lighting; shadows or glare can hinder readability. If the barcode is torn, try scanning only the most intact portion.
For faded barcodes, adjust the scanner’s contrast settings (if available) through configuration codes. Clean the barcode surface gently with a soft, dry cloth. If issues persist, manually enter the barcode number as a last resort. Consider requesting a replacement barcode if the original is consistently unscannable.

LS2208 Configuration & Programming
Customize your LS2208 with ease! This section details default settings, barcode configuration codes, and methods to tailor scanner behavior to your specific needs.
Default Scanner Settings

Upon initial power-up, the LS2208 barcode scanner operates with a pre-defined set of configurations designed for immediate usability in a wide range of common point-of-sale and data capture environments. These factory defaults prioritize ease of integration and broad compatibility.
By default, the scanner is typically configured to transmit data in a keyboard wedge mode, emulating keystrokes directly into the host system. The default symbology enabled includes UPC-A, EAN-13, and Code 39, covering many standard retail barcodes. The transmission of check digits is enabled, ensuring data accuracy.
The default interface is set for USB connectivity, though keyboard wedge is also supported. The scanner’s default beep volume is medium, providing audible feedback without being overly disruptive. It’s important to note that these settings can be readily modified using barcode configuration codes, allowing for complete customization to match your specific application requirements. Refer to the subsequent sections for detailed programming instructions.
Using Barcode Configuration Codes
The LS2208 scanner’s behavior is highly customizable through a series of pre-defined barcode configuration codes. These codes, resembling specific barcodes themselves, are scanned by the device to alter its operational parameters. This method provides a quick and efficient way to adjust settings without requiring a direct physical connection to a computer.
Each configuration code corresponds to a specific function, such as enabling or disabling symbologies, modifying interface settings (USB or keyboard wedge), or adjusting beep volumes. A comprehensive list of available codes and their corresponding functions is typically found in a separate configuration guide accompanying the scanner.
To apply a configuration change, simply locate the appropriate barcode in the guide, print it clearly, and scan it with the LS2208. The scanner will provide audible feedback confirming successful code recognition. Remember to scan codes one at a time, allowing the scanner to process each command before proceeding.
Customizing Scanner Behavior
Beyond basic configuration codes, the LS2208 allows for extensive customization to perfectly suit your specific application needs. This includes tailoring the scanner’s response to different barcode types, adjusting scan sensitivity for varying ambient light conditions, and modifying the audible and visual feedback provided during operation.
For example, you can prioritize certain symbologies, ensuring they are read before others, or disable those not required in your workflow. Adjusting scan sensitivity can improve performance when reading damaged or poorly printed barcodes. Furthermore, you can control the volume and duration of beep tones, or even disable them entirely for quiet environments.
These advanced customizations are typically achieved through a combination of barcode configuration codes and, in some cases, dedicated software utilities provided by the manufacturer, offering a user-friendly interface for fine-tuning scanner parameters.

Maintenance and Troubleshooting
Keep your LS2208 performing optimally! This section details routine cleaning procedures, addresses common operational issues, and guides you through a factory reset.
Cleaning the Scanner Window
Maintaining a pristine scanner window is crucial for optimal performance. Dust, dirt, and smudges can significantly impede the scanner’s ability to accurately read barcodes, leading to errors and reduced efficiency. Regularly cleaning the window ensures consistent and reliable scanning.
Recommended Cleaning Procedure: Gently wipe the scanner window with a soft, lint-free cloth. For stubborn dirt or grime, slightly dampen the cloth with isopropyl alcohol (90% or higher). Avoid using abrasive cleaners, solvents, or excessive moisture, as these can damage the window’s surface. Ensure the scanner is disconnected from power during cleaning. After cleaning, allow the window to dry completely before resuming operation. Consistent cleaning, even daily in high-use environments, will prolong the life and accuracy of your LS2208 scanner;
Common Issues and Solutions
Scanning Failures: If the scanner fails to read barcodes, first ensure the barcode is within the optimal scanning distance and angle. Check for damage or poor print quality on the barcode itself. Clean the scanner window thoroughly, as dirt or smudges are frequent culprits.
Connectivity Problems: For USB connections, verify the cable is securely connected to both the scanner and the computer. Try a different USB port. With keyboard wedge, confirm the interface is correctly configured on your system. Scanner Not Powering On: Ensure the cable is firmly connected and the power source is functioning. If issues persist, consult the factory reset procedure.

Beep Code Errors: Refer to the ‘Beep Codes and Troubleshooting’ section for specific error interpretations and resolutions.
Factory Reset Procedure
Caution: Performing a factory reset will erase all customized settings and restore the LS2208 to its original, out-of-the-box configuration. Ensure you have documented any critical configurations before proceeding.
Reset Method: The LS2208 typically utilizes a specific barcode configuration code for resetting. Locate the “Reset to Factory Defaults” barcode within the barcode configuration code section of this manual. Scan this barcode using the LS2208 scanner.
Verification: After scanning the reset code, the scanner will emit a distinct beep sequence, indicating successful completion. Verify the reset by checking if the scanner reverts to its default settings. If the reset fails, repeat the process, ensuring proper barcode scanning conditions.