The Brother P-Touch label maker simplifies creating custom labels with ease, offering versatility for various needs. Perfect for home or office use, it ensures efficient and professional results.
Overview of the Brother P-Touch Series
The Brother P-Touch series offers a wide range of label makers designed for versatility and durability. From basic models like the PT-1230PC to advanced options like the PT-2110, these devices cater to both home and office needs. Known for their user-friendly interfaces and compatibility with various label tapes, P-Touch label makers deliver professional results. With consistent quality and reliability, the series has become a trusted choice for creating custom labels efficiently.
Key Features and Benefits
The Brother P-Touch label maker offers a backlit LCD display for easy viewing and a QWERTY keyboard for efficient typing. It includes a built-in cutter for precise label trimming and supports various text formatting options such as bold, italic, and underlining. With auto-format layouts and custom templates, users can create professional labels quickly. The device is compatible with Brother’s TZe tapes, which are durable and laminated for long-lasting results. Its portability and optional battery operation make it ideal for use in different settings, ensuring convenience and flexibility for all labeling needs.
Why Use the Brother P-Touch Label Maker?
The Brother P-Touch label maker is an ideal choice for anyone needing to create professional, customizable labels with ease. Its intuitive design ensures quick and efficient labeling, while its durability and versatility make it suitable for both home and office environments. With features like auto-formatting and custom templates, it streamlines labeling tasks, saving time and effort. Additionally, its compatibility with Brother’s TZe tapes ensures high-quality, laminated labels that withstand wear and tear, making it a reliable tool for organizing and enhancing productivity.
System Requirements and Compatibility
The Brother P-Touch label maker works seamlessly with Windows and Mac operating systems, requiring the latest Brother software for optimal performance. It supports various label sizes and TZe tapes, ensuring compatibility with diverse labeling needs.
Operating System Compatibility
The Brother P-Touch label maker is compatible with both Windows and macOS operating systems. For Windows, it supports versions 10 and above, while macOS compatibility extends to 10.15 or later. Ensure your system meets these requirements for seamless functionality. The label maker also works with the latest Brother software, which can be downloaded from the official website. Regular updates are recommended to maintain compatibility and enhance performance. Always check the Brother Solutions Center for the most up-to-date operating system support and software requirements.
Software Requirements
The Brother P-Touch label maker requires compatible software for optimal performance. Download the latest Brother P-Touch software from the Brother Solutions Center. Ensure your system meets the software requirements, which vary by model but generally include Windows 10 or later and macOS 10.15 or newer. Regular software updates are essential for maintaining functionality and compatibility. Visit the Brother website to confirm specific software needs for your model and to access user manuals or guides for detailed instructions.
Hardware Specifications
The Brother P-Touch label maker features a high-resolution display for clear label previews. Models vary with options like QWERTY or ABCD keyboard layouts. Connectivity includes USB and Wi-Fi for wireless printing. Print speeds range up to 60mm/sec, depending on the model. Compatible with various tape widths, from 6mm to 24mm, and laminate options for durability. Built-in memory allows storing custom labels. Compact and lightweight designs ensure portability. Dimensions vary, but most models fit easily on desks or in workspaces. Energy-efficient with auto-shutoff to conserve power. Durable construction ensures long-term reliability for personal or professional use.
Setting Up Your Brother P-Touch Label Maker
Setting up your Brother P-Touch label maker is straightforward. Start by unboxing and installing the software, then connect the device to your computer. Calibration ensures optimal printing. Compatible with Windows and Mac, the label maker offers an intuitive interface for quick setup and operation.
Unboxing and Initial Setup
Unboxing your Brother P-Touch label maker is an exciting first step. Carefully remove the device from the packaging and verify all components are included, such as the label maker, power cable, tape cassette, and user manual. Insert the provided tape cassette into the machine, ensuring it clicks securely into place. Next, install the P-Touch software from the Brother Solutions Center or the provided CD. Connect the label maker to your computer via USB or Wi-Fi, following the on-screen instructions. Finally, power on the device and calibrate it to ensure proper label alignment and printing functionality.
Installing the Software
To install the software for your Brother P-Touch label maker, visit the Brother Solutions Center website. Select your specific P-Touch model from the menu to download the appropriate software. Once downloaded, run the installer and follow the on-screen instructions to complete the installation. Ensure your computer meets the system requirements beforehand to avoid compatibility issues. After installation, restart your computer if prompted, then connect your label maker via USB or Wi-Fi as instructed by the software. This setup ensures seamless integration for creating and printing labels efficiently.
Connecting the Label Maker to Your Computer
To connect your Brother P-Touch label maker to your computer, use a USB cable or Wi-Fi, depending on your model. For USB connection, insert the cable into both devices and let the computer recognize the label maker. Install any additional drivers if prompted. For Wi-Fi models, ensure both devices are on the same network and follow the on-screen instructions in the P-Touch software to establish a wireless connection. Visit the Brother Solutions Center for specific guidance tailored to your model to ensure a smooth setup process for seamless label printing.
Powering On and Calibration
To power on your Brother P-Touch label maker, press and hold the power button until the display lights up. Once powered on, ensure the tape cassette is properly loaded. The label maker will automatically calibrate the tape upon startup. Do not pull the tape during this process, as it may damage the cassette. Once calibration is complete, the device will emit a confirmation sound, indicating it is ready for use. Proper calibration ensures accurate printing and prevents issues with label alignment or feeding.

Creating and Editing Labels
The Brother P-Touch label maker offers straightforward label creation and editing. Users can easily input and format text, insert symbols, and manage accented characters for professional results.
Entering and Editing Text
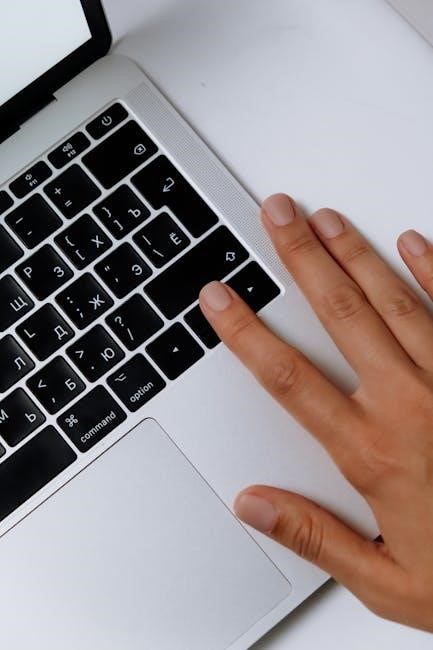
Entering and editing text on the Brother P-Touch label maker is straightforward. Use the QWERTY keyboard to type your text, then navigate with the arrow keys to edit. The backlit display allows easy previewing of your labels. You can input up to per line, depending on the model. Use the menu to adjust font size, bold text, or align your text left, center, or right. Once satisfied, save your label or print it immediately for quick, professional results.
Formatting Options
The Brother P-Touch label maker offers a variety of formatting options to enhance your labels. Choose from bold, italic, or underlined text to emphasize key information. Adjust font sizes to suit your needs, with options ranging from small to large. Align text left, center, or right for a professional look. You can also add symbols, special characters, or accented characters for customization. Some models include auto-format layouts, which automatically adjust text size and spacing for a polished appearance. These features ensure your labels are clear, readable, and visually appealing.
Using Symbols and Special Characters
The Brother P-Touch label maker allows you to add symbols, special characters, and even emojis to your labels. Access these by navigating through the built-in keyboard or using the software. Symbols can enhance readability and add visual appeal to your labels. For example, use arrows, icons, or emojis to draw attention to important information. Special characters are useful for creating labels in multiple languages or adding unique touches. This feature ensures your labels are both functional and visually engaging, making them stand out in any setting.
Entering Accented Characters
To enter accented characters using the Brother P-Touch label maker, navigate to the built-in keyboard or use the software. Select the desired language or accented character set from the menu. For example, you can add é, ñ, ü, or ß by pressing and holding the base letter. This feature is ideal for creating labels in multiple languages or adding unique characters for clarity. Accented characters ensure proper formatting and readability, making your labels more professional and contextually accurate, especially for international or specialized applications.
Advanced Label Customization
Enhance your labels with advanced customization options. Use auto-format layouts, create custom templates, add images, and print in various fonts and sizes for professional results.
Using Auto-Format Layouts
The Brother P-Touch label maker offers auto-format layouts to streamline label creation. These pre-designed templates help you produce professional-looking labels effortlessly; Choose from a variety of built-in layouts tailored for different purposes, such as address labels, file folders, or name tags. With auto-format, you can quickly align text, add symbols, and incorporate special characters without manual adjustments. This feature saves time and ensures consistency in your labels. Customize the layouts further by adjusting fonts, sizes, and colors to match your preferences, making your labeling tasks more efficient and visually appealing.
Creating Custom Templates
Custom templates allow you to design labels tailored to your specific needs. Use the Brother P-Touch software to create unique layouts, combining text, symbols, and images. Save these templates for reuse, ensuring consistency across projects. With the ability to edit and customize fonts, sizes, and alignments, you can create professional-looking labels effortlessly. This feature is ideal for frequently used labels, such as address tags or inventory markers, saving time and streamlining your labeling process. Organize your templates for quick access and future modifications.
Adding Images and Logos
The Brother P-Touch label maker allows you to enhance your labels by adding images and logos. Use the P-Touch software to upload your own images or select from built-in options. This feature is perfect for creating professional-looking labels with company logos or custom graphics. Ensure images are resized and formatted correctly before printing. The software guides you through the process, making it easy to incorporate visuals into your designs. This adds a personal touch to your labels, whether for business or personal use, and ensures they stand out.
Printing in Different Fonts and Sizes
The Brother P-Touch label maker offers flexibility in font selection and size adjustment. Users can choose from various built-in fonts and adjust text size to suit their labeling needs. The P-Touch software allows easy customization, enabling you to enhance readability or add visual appeal. Whether creating labels for files, cables, or gifts, this feature ensures your text is clear and appropriately sized. Experiment with different options to find the perfect balance for your labels, making them both functional and visually appealing. This adds professionalism to any labeling task.

Using the Brother P-Touch Label Maker
The Brother P-Touch label maker offers a user-friendly design for seamless label creation. With intuitive controls and clear displays, it ensures efficient labeling for various tasks and projects.
Step-by-Step Guide to Printing Labels
Insert the tape cassette into the label maker, ensuring it clicks into place securely.
Power on the device using the power button, waiting for it to initialize.
Use the navigation buttons to select your desired settings from the LCD menu.
Type your label text using the QWERTY keyboard, utilizing backspace if needed for corrections.
Adjust formatting options like font size or bold text, and consider using auto-format layouts.
Preview your label to ensure it meets your expectations before printing.
Press the print button to start printing; ensure the tape is properly fed.
Allow the label maker to print and automatically cut the label to size.
Save your label design for future use if desired.
Regularly clean and maintain the device to prevent jams and ensure optimal performance.
Adjusting Label Settings
Adjust label settings to customize size, font, and layout; Use the navigation buttons to select options like font size, bold text, or italics.
Choose alignment options, such as left, center, or right justification.
Set margins to control spacing and ensure labels fit perfectly.
Select tape length to avoid wastage, cutting labels to precise sizes.
Preview changes on the LCD screen to confirm settings.
Save custom settings for consistent results in future label creations.
Access advanced options like auto-format layouts for professional designs.
Ensure settings align with your tape width for optimal printing performance.
Using the Cutter Function
The Brother P-Touch label maker features an integrated cutter for precise label trimming.
After printing, press the cutter button to neatly slice the label from the tape.
For manual cutting, use the built-in scissors symbol on the keyboard.
Auto-cutting modes are available for hands-free operation.
Select “Auto Cut” in settings for labels to be cut automatically after printing.
This function prevents tape waste and ensures clean, professional edges.
Use the cutter carefully to avoid damaging the tape cassette or mechanism.
Regular maintenance ensures optimal performance of the cutter function.
Saving and Reusing Labels
The Brother P-Touch label maker allows you to save and reuse labels for future use.
Use the “File” menu to save labels to your computer or the device’s internal memory.
Select “Save As” and choose a location to store your label designs.
To reuse a label, navigate to the “File” menu and select “Open” to retrieve saved designs.
This feature is ideal for frequently used labels, saving time and reducing redundancy.
Ensure labels are named clearly for easy identification.
The P-Touch software supports various file formats for compatibility.
Regularly back up your labels to prevent data loss.
This function enhances efficiency and streamlines label creation for consistent results.
Troubleshooting Common Issues
Troubleshoot printing, software, or tape issues with the Brother P-Touch label maker. Identify common problems and resolve them using the manual’s error message guide and solutions.
Resolving Printing Problems
Identify common printing issues such as misfeeds or poor print quality. Check the tape cassette installation and ensure it is properly aligned. Inspect the print head for dust or debris and clean it gently if necessary. Verify that the correct label size and type are selected in the software. If issues persist, consult the user manual for specific error messages and troubleshooting steps. Resetting the device or updating firmware may also resolve persistent printing problems. Always refer to the manual for detailed solutions.
Fixing Software Glitches
Encounter software issues? Restart the P-Touch software and ensure it’s updated. Reinstalling the program may resolve glitches. Check for firmware updates via the Brother Solutions Center. Ensure drivers are correctly installed and compatible with your OS. If problems persist, reset the label maker and reconnect it to your computer. Refer to the user manual for troubleshooting guides. For additional support, visit online forums or contact Brother’s customer service for assistance.
Handling Tape and Cassette Issues
Experiencing tape or cassette problems? Ensure the tape is properly loaded and aligned. Avoid pulling the tape during printing, as this may damage the cassette. If the tape jams, turn off the label maker, carefully remove the jammed tape, and reload a new cassette. Clean the cassette area regularly to prevent debris buildup. If issues persist, replace the tape cassette. Refer to the user manual for detailed instructions on tape handling and maintenance to ensure optimal performance and prevent further complications.
Common Error Messages and Solutions
Encounter error messages? Common issues include “Paper Jam” or “Low Battery.” For “Paper Jam,” turn off the device, gently remove the jammed tape, and restart. If “Low Battery” appears, charge or replace batteries. “Tape End” indicates the tape needs replacement. “No Tape” means the cassette is missing or improperly loaded. For persistent errors, update the firmware or reset the device. Refer to the user manual for specific solutions, or visit Brother’s support site for troubleshooting guides to resolve issues quickly and effectively.

Maintenance and Care
Regularly clean the label maker to prevent dust buildup. Handle the device gently and store it in a dry, cool place. Avoid pulling the tape forcefully to prevent damage. Update firmware regularly for optimal performance. Refer to the user manual for detailed maintenance instructions to ensure longevity and efficiency of your Brother P-Touch label maker.
Cleaning the Label Maker
Regular cleaning ensures optimal performance and prevents dust buildup. Turn off the device and unplug it before cleaning. Use a soft, dry cloth to gently wipe the exterior and internal surfaces. Avoid using harsh chemicals or liquids, as they may damage the components. For stubborn dust, a slightly damp cloth can be used, but ensure it is thoroughly dried afterward. Cleaning the print head and tape compartment regularly helps maintain print quality and prevents jams. Refer to the user manual for detailed cleaning instructions to keep your Brother P-Touch label maker in excellent condition.
Replacing the Tape Cassette
To replace the tape cassette, turn off the label maker and ensure it is unplugged. Open the cassette compartment, usually located at the top or front, depending on the model. Gently pull out the old cassette and discard it. Insert the new cassette, ensuring it clicks into place securely. Close the compartment and test the device by printing a small label. Avoid forcing the tape or pulling it roughly, as this could damage the mechanism. Refer to your user manual for specific model instructions to ensure proper installation and functionality.
Updating Firmware
Updating the firmware of your Brother P-Touch label maker ensures optimal performance and access to the latest features. Visit the Brother Support website, select your specific model, and download the firmware update. Use the provided software to install the update, following the on-screen instructions carefully. Ensure the label maker is connected to your computer and remains powered on throughout the process. Avoid interrupting the update to prevent potential damage or malfunctions. Regular firmware updates help maintain compatibility and improve functionality, ensuring your device operates smoothly and efficiently.
Storage and Handling Tips
Proper storage and handling ensure your Brother P-Touch label maker remains in excellent condition. Store the device in a dry, cool place away from direct sunlight and moisture. Avoid dropping or exposing it to extreme temperatures. Use the original packaging or a protective case for safe transportation. Regularly clean the label maker to prevent dust buildup. When not in use, remove the tape cassette and store it separately to maintain quality. Always use genuine Brother accessories to avoid damage. Follow these tips to preserve performance and extend the lifespan of your label maker.
Downloading and Accessing the User Manual
Access the Brother Solutions Center, select your P-Touch model, and download the user manual in PDF format for easy reference and troubleshooting.
Steps to Download the Brother P-Touch Manual
To download the Brother P-Touch manual, visit the Brother Solutions Center. Click on “Manuals” and select your specific P-Touch model from the menu. Follow the prompts to download the PDF manual. This provides easy access to instructions, troubleshooting, and feature details. The process is quick and ensures you have all the information needed to operate your label maker effectively. The manual is available 24/7, making it convenient for users to reference anytime.
Navigating the Brother Solutions Center
Navigate to the Brother Solutions Center website and locate the “Manuals” section. Select your P-Touch model from the product category menu. Use the search function to quickly find your specific label maker. Once on the model page, click the “Manuals” tab to view and download the user manual. This streamlined process ensures easy access to guides, troubleshooting tips, and detailed instructions tailored to your P-Touch device, helping you maximize its functionality and resolve any issues efficiently.
Accessing Manuals for Specific Models
Accessing manuals for specific Brother P-Touch models is straightforward. Visit the Brother Solutions Center and navigate to the Manuals section. Select your product category and search for your model. Once found, click to view or download the manual in PDF format. This ensures you have precise instructions tailored to your device, helping you optimize its performance and troubleshoot effectively;
Printing or Saving the Manual
Once you’ve accessed the Brother P-Touch manual, you can easily print or save it for future reference. Download the PDF version and use standard PDF tools to print specific pages or the entire document. For convenience, save the manual to your computer or cloud storage. This ensures quick access to instructions, troubleshooting guides, and other essential information whenever needed. Printing or saving the manual helps you refer to it offline, making it a reliable resource for optimizing your label maker’s performance.
Additional Resources and Support
Explore online communities, forums, and video tutorials for tips and troubleshooting. Access customer service, technical support, and FAQs for comprehensive assistance with your Brother P-Touch label maker.
Online Communities and Forums
Engage with active online communities and forums dedicated to Brother P-Touch users. These platforms offer valuable resources, including user manuals, troubleshooting guides, and repair tips. Websites like PtouchDirect;com and ManualsLib provide access to downloadable manuals and user guides. Additionally, forums allow users to share experiences, ask questions, and receive advice from experienced P-Touch label maker owners. These communities are ideal for resolving issues, learning advanced features, and staying updated on the latest software and hardware developments.
Customer Service and Technical Support
Brother offers comprehensive customer service and technical support for P-Touch label maker users. Visit the Brother Solutions Center for direct access to manuals, troubleshooting guides, and software updates. Websites like PtouchDirect.com and ManualsLib also provide downloadable resources and user guides. Additionally, Brother’s dedicated support team is available to address queries and resolve issues promptly. These resources ensure users can efficiently troubleshoot and maintain their label makers, enhancing overall productivity and user satisfaction.
Video Tutorials and Guides
Brother provides an array of video tutorials and guides to help users master their P-Touch label makers. Official Brother websites and platforms like YouTube offer step-by-step instructions for setup, troubleshooting, and advanced features. Videos cover topics such as label creation, software installation, and customization. Models like the PT-1230PC and PT-D450 have dedicated tutorials, ensuring users can maximize their device’s potential. These resources are ideal for both beginners and experienced users, offering visual guidance to enhance productivity and resolve common issues efficiently.
Frequently Asked Questions (FAQs)
Common questions about the Brother P-Touch include queries on label maker setup, tape replacement, and troubleshooting. Users often ask how to install software, resolve printing issues, and access manuals. FAQs also cover topics like compatible tape sizes, font customization, and error message solutions. For detailed answers, refer to the user manual or visit Brother’s official support website. These resources provide clear guidance to address common concerns and enhance your labeling experience with the P-Touch series.