Honeywell TH6320WF2003 Installation Manual: A Comprehensive Plan
This manual details the professional installation of the Honeywell TH6320WF2003 Lyric T6 Pro Wi-Fi thermostat‚ covering wiring‚ app setup‚ and troubleshooting procedures.
It includes guides for both heat pump and conventional systems‚ alongside component verification and safety precautions for a seamless installation experience.
Access to downloadable resources like the owner’s manual and installation instructions are provided‚ ensuring a thorough understanding of the device’s capabilities.
The Honeywell TH6320WF2003 Lyric T6 Pro Wi-Fi thermostat represents a significant advancement in home climate control‚ offering programmable functionality and seamless integration with popular smart home ecosystems like Alexa and Google Assistant. This thermostat is designed for compatibility with both heat pump and conventional heating/cooling systems‚ supporting up to 3 stages of heat and 2 stages of cool‚ or 2 heat/2 cool configurations.
Its core features include remote access and control via the Honeywell Home app‚ enabling users to adjust temperatures‚ create schedules‚ and monitor energy usage from anywhere. The thermostat’s professional installation guide‚ alongside the owner’s manual‚ provides detailed instructions for a successful setup‚ ensuring optimal performance and user experience.
This guide will walk installers through each step‚ from pre-installation checks to final configuration‚ guaranteeing a reliable and efficient heating and cooling system.
Package Contents Verification
Upon receiving the Honeywell TH6320WF2003‚ carefully verify all components are present before commencing installation. The package should include the Lyric T6 PRO Wi-Fi Thermostat itself‚ the UWP Mounting System for simplified wall mounting‚ and a Honeywell Standard Installation Adapter – often referred to as a J-box adapter – to ensure compatibility with existing wiring setups.
Additionally‚ a Honeywell Decorative Cover Plate is included‚ offering a clean and aesthetically pleasing finish once installation is complete. Confirm the presence of all these items to avoid delays during the installation process. Missing components should be reported to Honeywell support immediately.
Proper verification ensures a smooth and efficient installation experience.
Lyric T6 PRO Wi-Fi Thermostat

The Honeywell TH6320WF2003 Lyric T6 PRO Wi-Fi Thermostat is the central component of your smart home climate control system. This programmable thermostat supports up to 3 stages of heat and 2 stages of cool for heat pump systems‚ or 2 heat and 2 cool for conventional setups.
It boasts compatibility with popular voice assistants like Alexa and Google Assistant‚ enabling convenient voice control. The thermostat connects to your home’s Wi-Fi network‚ allowing remote access and control via the Honeywell Home app.
Its sleek design and intuitive interface provide both functionality and aesthetic appeal.
UWP Mounting System Components
The Universal Wireless Platform (UWP) mounting system is designed for versatile installation‚ accommodating various wall configurations. This system typically includes a mounting plate‚ screws‚ and wall anchors for secure attachment.
It ensures a stable base for the Lyric T6 PRO thermostat‚ simplifying the wiring process and providing a clean aesthetic. The UWP system is compatible with standard J-boxes‚ and an adapter is included for installations where a J-box isn’t present.
Proper use of these components is crucial for a successful and reliable installation.
Honeywell Standard Installation Adapter (J-box adapter)
The included J-box adapter facilitates installation when an existing J-box is not present‚ or is incompatible with the UWP mounting system. This adapter provides a secure mounting point for the thermostat backplate‚ ensuring stable operation.
It effectively bridges the gap‚ allowing for a professional and reliable installation in a wider range of homes. The adapter is designed for easy attachment to the wall‚ utilizing standard screws and anchors.
Correctly utilizing this adapter is vital for a clean and functional setup.
Honeywell Decorative Cover Plate
The Honeywell Decorative Cover Plate enhances the aesthetic appeal of the installed thermostat‚ concealing the mounting hardware and providing a finished look. It’s designed to seamlessly blend with various interior décor styles.
Measuring 4-49/64 inches (121mm)‚ this cover plate offers a clean and modern appearance. Installation is straightforward‚ simply snapping over the mounted thermostat backplate after wiring is complete.
This plate contributes to a professional installation‚ improving the overall visual integration of the thermostat within the home environment.
Safety Precautions
Prior to installation‚ always disconnect power to the heating and cooling system at the breaker box to avoid electrical shock. Verify the system is completely de-energized using a non-contact voltage tester.
Exercise caution when handling wiring‚ ensuring connections are secure and properly insulated. If you are uncomfortable working with electrical wiring‚ consult a qualified HVAC professional.
Follow all local electrical codes and regulations during the installation process. Proper grounding is essential for safe operation and to prevent damage to the thermostat or connected equipment.
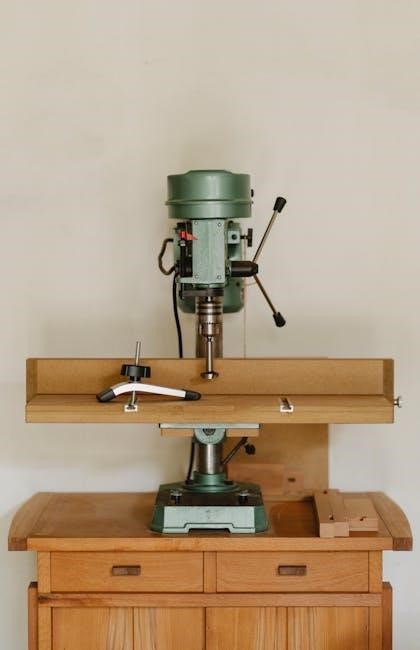
Tools Required for Installation
A Phillips head screwdriver is essential for removing and installing the thermostat and mounting plate. A flathead screwdriver may be needed for certain terminal connections. Wire strippers are crucial for preparing wires for secure connections.
A non-contact voltage tester is vital to confirm power is off before handling wiring. Level ensures the thermostat is mounted straight. Pencil for marking wire locations.
Drill with appropriate bits may be necessary for mounting the plate‚ and pliers can assist with wire manipulation. Optional: a multimeter for voltage verification.
Pre-Installation Checklist
Verify system compatibility: determine if you have a heat pump or conventional heating/cooling system. Confirm voltage to ensure the thermostat is compatible with your system’s power supply. Gather necessary tools – screwdriver‚ wire strippers‚ voltage tester‚ and level.
Download the Honeywell Home app for setup and configuration. Create a Honeywell Home account if you don’t already have one. Review the wiring diagram for your specific system.
Turn off power to the HVAC system at the breaker before starting any work.
Compatibility Check (Heat Pump vs. Conventional Systems)
The Honeywell TH6320WF2003 supports both heat pump and conventional (forced air) systems‚ but wiring differs significantly. Heat pump systems typically utilize up to 3 heat/2 cool stages‚ requiring specific wiring configurations for O/B terminals.
Conventional systems generally employ 2 heat/2 cool stages‚ with simpler wiring for heat (W) and cool (Y) stages. Incorrect wiring can damage the thermostat or HVAC equipment.
Carefully identify your system type before proceeding with installation to ensure proper functionality and avoid potential issues.
Voltage Verification
Before installation‚ verify the voltage at the thermostat wiring. The Honeywell TH6320WF2003 typically requires 24VAC‚ commonly supplied by the HVAC system’s control board. Using a multimeter‚ carefully measure the voltage between the R (power) and C (common) terminals.
Ensure the voltage is within the acceptable range (20-30VAC). Incorrect voltage can cause thermostat malfunction or damage. If the voltage is outside this range‚ consult an HVAC professional before proceeding.
Never work with line voltage (120V/240V) at the thermostat; it’s extremely dangerous.
Removing the Old Thermostat
Prior to installing the Honeywell TH6320WF2003‚ safely remove your existing thermostat. Begin with a crucial power shut-off – turn off the HVAC system at the breaker box to avoid electrical shock. Carefully remove the thermostat cover‚ exposing the wiring terminals.
Before disconnecting any wires‚ meticulously label each wire with the corresponding terminal designation (R‚ C‚ W‚ Y‚ G‚ etc.). This step is critical for correct wiring of the new thermostat.
Once labeled‚ disconnect the wires and remove the old mounting plate.
Power Shut-Off Procedure
Ensuring complete power disconnection is paramount before commencing thermostat removal or installation. Locate the circuit breaker that controls your HVAC system – typically labeled “Furnace” or “HVAC”. Firmly switch the breaker to the “OFF” position‚ completely cutting power to the system.
Verify power is off by attempting to operate the HVAC system using its normal controls. Double-check with a non-contact voltage tester at the thermostat wires for added safety.
This precaution prevents electrical shock and safeguards both you and the thermostat during the installation process.
Wire Labeling – Critical Step
Before disconnecting any wires from your old thermostat‚ meticulous labeling is absolutely essential. Use the provided wire labels‚ or create your own using masking tape and a permanent marker. Carefully mark each wire corresponding to its terminal designation – R‚ C‚ W‚ Y‚ and G are common examples.
Accurate labeling prevents wiring errors during the Honeywell TH6320WF2003 installation‚ avoiding potential system malfunctions. Take a clear photograph of the existing wiring as a backup reference.
Double-check your labels before disconnecting any wires to ensure a smooth and error-free installation.
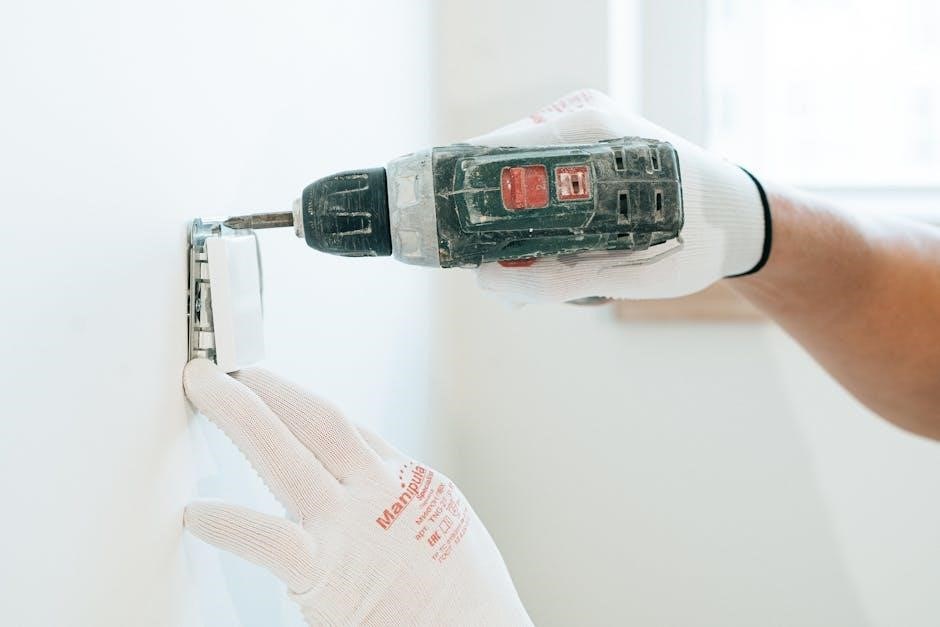
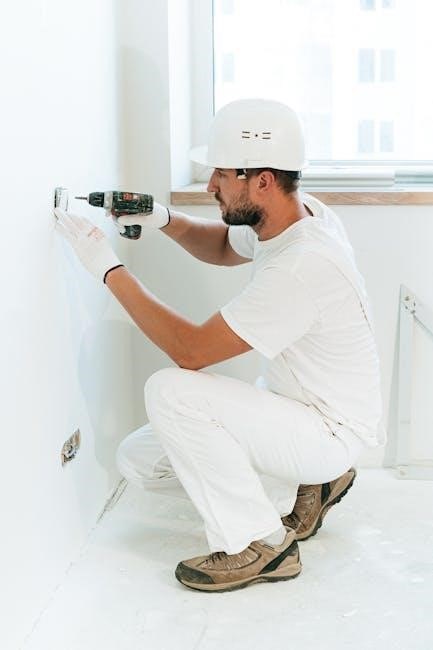
Installing the Mounting Plate
The Honeywell TH6320WF2003 utilizes either the Universal Wall Plate (UWP) system or a J-box adapter‚ depending on your existing wiring setup. For UWP installation‚ secure the plate to the wall using the provided screws and anchors‚ ensuring it’s level.
If a J-box is present‚ utilize the Honeywell standard installation adapter for a flush mount. Ensure the mounting plate is firmly attached before proceeding with wiring.
Proper mounting is crucial for a stable and aesthetically pleasing thermostat installation.
Using the UWP Mounting System
The Universal Wall Plate (UWP) offers flexible mounting options for the Honeywell TH6320WF2003. Begin by positioning the UWP on the wall where the old thermostat was located‚ marking the screw holes.
Drill pilot holes if necessary‚ then secure the UWP to the wall using the provided screws and anchors. Ensure the plate is level for proper thermostat alignment.
The UWP accommodates various wiring configurations‚ providing a clean and stable base for the thermostat.
Utilizing the J-box Adapter
If your wall lacks sufficient mounting support‚ the Honeywell J-box adapter is essential. Securely attach the adapter to the existing electrical box in the wall‚ ensuring a flush fit.
The adapter provides a stable platform for the UWP mounting system‚ accommodating wiring and offering a secure connection point.
Confirm the adapter is firmly in place before proceeding with the UWP installation‚ guaranteeing a reliable and professional thermostat mounting solution.
Wiring the Honeywell TH6320WF2003
Carefully connect the thermostat wires to the corresponding terminals on the Honeywell baseplate. Identify R‚ C‚ W‚ Y‚ and G terminals‚ referencing your old thermostat’s wiring labels.
Heat pump systems require specific configurations‚ potentially utilizing additional terminals. Conventional systems generally follow a simpler wiring scheme.
Double-check all connections for tightness and accuracy before proceeding‚ ensuring a secure and functional thermostat installation.
Identifying Terminal Connections (R‚ C‚ W‚ Y‚ G)
The ‘R’ terminal provides power‚ while ‘C’ completes the circuit‚ essential for consistent operation. ‘W’ activates heating‚ ‘Y’ controls cooling‚ and ‘G’ energizes the fan.
Accurate identification is crucial; miswiring can damage the system or thermostat. Refer to your old thermostat’s wiring and the Honeywell documentation for clarity.
Properly labeled wires ensure a smooth installation and prevent future troubleshooting headaches. Confirm each connection before powering on the system.
Heat Pump Wiring Configurations
Heat pump systems require specific wiring due to their dual heating and cooling capabilities. Common terminals include Y for cooling‚ W1 for auxiliary heat‚ and W2 for emergency heat.
The ‘O/B’ terminal reverses the valve for heating or cooling mode. Carefully review the wiring diagram provided with the thermostat and your existing system.
Incorrect wiring can lead to inefficient operation or system malfunction. Double-check all connections before energizing the thermostat to ensure proper functionality.
Conventional System Wiring Configurations
Conventional heating and cooling systems utilize a simpler wiring setup. The ‘R’ terminal provides power‚ while ‘W’ controls heating and ‘Y’ controls cooling. A ‘G’ terminal activates the fan‚ and ‘C’ provides a common wire for consistent power.
Ensure the wiring matches your existing system and the thermostat’s diagram. Properly connecting these wires is crucial for correct operation.
Verify that the voltage is compatible and that all connections are secure before powering on the thermostat to avoid potential issues.
Attaching the Thermostat to the Mounting Plate
Once wiring is complete‚ carefully align the Honeywell TH6320WF2003 with the installed mounting plate. Gently push the thermostat onto the plate‚ ensuring all wires are tucked neatly inside the wall opening.
A secure click indicates a proper connection. Avoid forcing the thermostat‚ as this could damage the wiring or the unit itself. Verify the thermostat sits flush against the wall.
Finally‚ attach the decorative cover plate‚ concealing the mounting plate and providing a finished look.
Powering On and Initial Setup
After securely attaching the thermostat‚ restore power at the breaker box. The Honeywell TH6320WF2003 should power on automatically‚ displaying the welcome screen. Follow the on-screen prompts to begin the initial setup process.
This includes selecting the system type (heat pump or conventional) and configuring basic settings like date‚ time‚ and zip code. Ensure accurate information for optimal performance.
The thermostat will then guide you through connecting to your home’s Wi-Fi network.
Connecting to Wi-Fi
To connect the Honeywell TH6320WF2003 to Wi-Fi‚ utilize the Honeywell Home app on your smartphone or tablet. Ensure your mobile device is connected to your desired 2.4 GHz Wi-Fi network.
Within the app‚ select “Add a Device” and follow the guided instructions. The app will search for the thermostat and prompt you to enter your Wi-Fi password.
Successful connection enables remote control and access to smart features.
Using the Honeywell Home App
The Honeywell Home app is central to controlling your TH6320WF2003. Download it from the App Store or Google Play and create an account‚ or log in if you already have one.
The app allows remote temperature adjustments‚ scheduling‚ and monitoring of energy usage. It also provides access to advanced features like geofencing and smart alerts.
The intuitive interface simplifies thermostat management‚ offering a convenient and user-friendly experience.
Honeywell Home App Configuration
After downloading‚ create a Honeywell Home account within the app‚ following the on-screen prompts for registration. Then‚ register your TH6320WF2003 thermostat by selecting “Add a Device” and following the guided setup process.
The app will walk you through connecting the thermostat to your home’s Wi-Fi network. Once connected‚ you can establish temperature schedules tailored to your lifestyle‚ optimizing comfort and energy savings.
Customize settings and explore advanced features for a personalized experience.
Account Creation and Device Registration
Begin by downloading the Honeywell Home app to your smartphone or tablet. Launch the app and select “Create Account”‚ providing the required information such as your email address and creating a secure password.
Verify your email address through the confirmation link sent to your inbox. Next‚ add your TH6320WF2003 thermostat by choosing “Add a Device” within the app’s interface.
Follow the in-app instructions to complete the registration process‚ ensuring a seamless connection.
Setting Temperature Schedules
Within the Honeywell Home app‚ navigate to the “Schedule” section. Here‚ you can customize temperature settings for different times of the day and days of the week‚ optimizing comfort and energy savings.
Create personalized schedules tailored to your lifestyle‚ setting different temperatures for wake‚ leave‚ return‚ and sleep periods. Utilize the app’s intuitive interface to easily adjust these settings.
Save your customized schedules to ensure consistent and automated temperature control.
Setting System Parameters
Access the “Settings” menu within the Honeywell Home app to configure system parameters. Here‚ you can define crucial settings like heat and cool temperature setpoints‚ ensuring optimal comfort levels.
Adjust the minimum and maximum temperature limits to prevent extreme settings. Configure swing settings to control the temperature differential‚ influencing cycle times and comfort.
Proper parameter configuration is vital for efficient operation and personalized climate control‚ maximizing the thermostat’s capabilities.
Heat and Cool Temperature Setpoints

Within the Honeywell Home app‚ navigate to the temperature settings to establish desired heat and cool setpoints. These values dictate when the system activates heating or cooling modes‚ maintaining a comfortable indoor environment.
Separate setpoints can be defined for occupied and unoccupied periods‚ optimizing energy efficiency. Consider personal preferences and seasonal changes when adjusting these values.
Accurate setpoint configuration is crucial for achieving desired temperatures and minimizing energy consumption‚ enhancing overall system performance.

Understanding the Thermostat Display
The Honeywell TH6320WF2003 features a clear‚ intuitive display presenting essential information at a glance. Key elements include the current temperature‚ setpoint temperature‚ operating mode (heat‚ cool‚ auto‚ off)‚ and Wi-Fi connection status.
Icons indicate system activity‚ such as fan operation or heating/cooling engagement. The display also shows scheduled program information and alerts for maintenance or system issues.
Familiarizing yourself with these indicators ensures effective monitoring and control of your home’s climate‚ maximizing comfort and efficiency.
Troubleshooting Common Issues
If you encounter problems with your Honeywell TH6320WF2003‚ several common issues have straightforward solutions. Wi-Fi connection problems can often be resolved by restarting the thermostat and router‚ or checking network credentials.
If the thermostat isn’t powering on‚ verify the C-wire connection and breaker status. Incorrect wiring is another frequent cause‚ so double-check the terminal connections.
Consult the Honeywell Home app or online resources for further assistance and detailed troubleshooting steps‚ ensuring a quick return to optimal performance.
Wi-Fi Connection Problems
Experiencing Wi-Fi connectivity issues with your Honeywell TH6320WF2003? Begin by restarting both your thermostat and your home’s Wi-Fi router. Ensure the correct Wi-Fi password is entered within the Honeywell Home app during setup.
Verify that your Wi-Fi network is operating on the 2.4 GHz band‚ as the thermostat may not support 5 GHz. Check for any obstructions or interference near the thermostat.
If problems persist‚ consult the Honeywell support website for detailed troubleshooting guides and potential firmware updates.
Thermostat Not Powering On
If your Honeywell TH6320WF2003 fails to power on‚ first confirm the power supply at the breaker is active. Double-check all wiring connections‚ ensuring the ‘C’ wire (common wire) is securely connected – this is crucial for consistent power.
Verify the thermostat is properly seated on the mounting plate. If using a J-box adapter‚ ensure it’s correctly installed and wired.
A blown fuse or a faulty transformer could also be the cause; consult a qualified HVAC technician if issues remain.
FCC ID HS9-TH6220WF01 Information
The Honeywell TH6320WF2003 utilizes the FCC ID HS9-TH6220WF01‚ signifying compliance with Federal Communications Commission regulations regarding radio frequency emissions.
This ID confirms the device has undergone testing and meets established limits for safe operation. Documentation related to this FCC identification is publicly available‚ including the user manual submitted on 2016-07-06.
The FCC ID ensures the thermostat operates within legal boundaries‚ minimizing potential interference with other electronic devices.
Honeywell T Series Brochure Overview
The Honeywell T Series brochure highlights the TH6320WF2003 as a key component‚ showcasing its advanced features and compatibility with smart home ecosystems like Alexa and Google Assistant.
This brochure details the thermostat’s programmable capabilities‚ offering up to 3 stages of heat and 2 of cool for optimized comfort and energy savings.
It provides a comprehensive overview of the entire T Series line‚ emphasizing Honeywell’s commitment to innovative home comfort solutions‚ available as a 329 KB PDF.
Dimensions and Specifications
The Honeywell TH6320WF2003 boasts a compact design‚ ensuring seamless integration into various home decors. Specifically‚ the decorative cover plate measures 4-49/64 inches (121mm) in diameter‚ providing a refined aesthetic.
Detailed specifications are available in the owner’s manual‚ outlining the thermostat’s operational parameters and compatibility requirements.
These dimensions are crucial for installers‚ guaranteeing proper fit and a professional finish during the installation process‚ alongside included screws and anchors.
Decorative Cover Plate Size (4-49/64 in / 121mm)
The Honeywell TH6320WF2003 utilizes a decorative cover plate with precise dimensions‚ measuring 4-49/64 inches‚ which is equivalent to 121 millimeters in diameter. This standardized size ensures compatibility with common wall setups and simplifies the installation process.
Installers should verify adequate space before mounting to accommodate the plate’s dimensions. The cover plate’s aesthetic design complements various interior styles‚ enhancing the thermostat’s overall appearance.
Proper alignment is key for a polished‚ professional finish.
User Manual and Documentation Access
Comprehensive documentation for the Honeywell TH6320WF2003 is readily available online. Users can access the Owner’s Manual (PDF‚ 1.10 MB) and the Professional Install Guide through Honeywell’s support website and ManualsLib.
Detailed installation instructions (PDF‚ 2.55 MB) are also provided‚ alongside the Honeywell T Series Brochure (PDF‚ 329 KB). These resources cover all aspects‚ from initial setup to troubleshooting.
FCC ID HS9-TH6220WF01 documentation is accessible for regulatory compliance information.
Warranty Information
Honeywell provides a warranty for the TH6320WF2003 Lyric T6 Pro Wi-Fi Thermostat‚ ensuring protection against manufacturing defects. Specific warranty terms and duration are detailed in the product’s documentation‚ typically included with the thermostat packaging.
Warranty coverage may vary based on the region and purchase date. Registration of the product may be required to activate the full warranty benefits.
For detailed warranty information and claim procedures‚ please refer to the official Honeywell Home website or contact Honeywell Support directly.
Contacting Honeywell Support
For assistance with the Honeywell TH6320WF2003 installation or operation‚ Honeywell offers multiple support channels. Customers can access online resources‚ including FAQs and troubleshooting guides‚ on the Honeywell Home website.
Direct support is available via phone‚ with contact numbers listed on the Honeywell website. Additionally‚ online chat support may be accessible for quick assistance.
Ensure you have the model number readily available when contacting support for efficient service.