
Welcome to the Nikon COOLPIX P500 Owner’s Manual. This guide provides comprehensive instructions for operating your camera, covering key features, setup, and troubleshooting for optimal performance.
1.1 Overview of the Nikon COOLPIX P500 Camera
The Nikon COOLPIX P500 is a versatile digital camera designed for photography enthusiasts. It features a 36x NIKKOR zoom lens, offering wide-angle to super-telephoto capabilities. Equipped with a 12.1 MP Backside Illumination CMOS sensor, it captures high-quality images in various lighting conditions. The EXPEED C2 dual image processors enhance image processing, while the Five-Way Vibration Reduction system ensures stable shots. With Full HD video recording and advanced shooting modes, the P500 is ideal for both casual and professional use, providing a balance of power and portability.
1.2 Importance of Reading the Owner’s Manual
Reading the Nikon COOLPIX P500 Owner’s Manual is essential for understanding the camera’s operations, features, and settings. It provides detailed guidance on optimizing image quality, using advanced modes, and troubleshooting common issues. The manual helps users unlock the full potential of the camera, ensuring they make the most of its capabilities. By familiarizing yourself with the manual, you can enhance your photography skills, resolve technical difficulties, and enjoy a seamless shooting experience with your Nikon COOLPIX P500.
1.3 Key Features of the Nikon COOLPIX P500
The Nikon COOLPIX P500 is equipped with a 36x NIKKOR zoom lens, offering wide-angle to super-telephoto coverage. It features a 12.1 MP Backside Illumination CMOS sensor for improved low-light performance and EXPEED C2 dual image processors for enhanced image processing. The camera also includes Five-Way Vibration Reduction (VR) Image Stabilization, reducing camera shake and blur. With advanced shooting modes, intuitive controls, and a high-resolution LCD screen, the P500 is designed to deliver versatile and high-quality photography experiences for both casual and advanced users.

Key Features of the Nikon COOLPIX P500
The Nikon COOLPIX P500 boasts a 36x NIKKOR zoom lens, 12.1 MP Backside Illumination CMOS sensor, EXPEED C2 dual processors, and Five-Way VR stabilization for sharp, detailed images.
2.1 36x NIKKOR Zoom Lens
The Nikon COOLPIX P500 features a 36x NIKKOR zoom lens, offering an impressive focal range of 22.9mm to 1082mm (35mm equivalent). This lens excels at capturing wide-angle landscapes and distant subjects with remarkable clarity. Its super-telephoto capabilities allow for crisp close-ups, making it ideal for wildlife and sports photography. The lens design ensures minimal distortion and chromatic aberration, delivering sharp, vibrant images across the entire zoom range. This versatility makes it a standout feature for photographers seeking a single lens solution for diverse shooting scenarios.
2.2 12.1 MP Backside Illumination CMOS Sensor
The Nikon COOLPIX P500 is equipped with a 12.1-megapixel Backside Illumination CMOS sensor, designed to enhance light capture and reduce noise. This advanced sensor improves low-light performance, delivering clearer images in challenging lighting conditions. Backside illumination technology maximizes photon capture, resulting in better dynamic range and color accuracy. The sensor works seamlessly with the EXPEED C2 image processors to ensure high-quality images with minimal grain, even at higher ISO settings. This combination makes the P500 ideal for capturing sharp, detailed photos in various environments.
2.3 EXPEED C2 Dual Image Processors
The Nikon COOLPIX P500 features EXPEED C2 dual image processors, which enhance image processing speed and quality. These processors optimize sensor data, reducing noise and improving color reproduction. They enable faster autofocus, quicker shot-to-shot times, and smoother video recording. The EXPEED C2 system also supports advanced features like continuous shooting and HDR capture. By efficiently managing the camera’s operations, the dual processors ensure that every image and video is captured with precision and clarity, making the P500 a versatile tool for photographers.
2.4 Five-Way Vibration Reduction (VR) Image Stabilization
The Nikon COOLPIX P500 incorporates Five-Way Vibration Reduction (VR) Image Stabilization, which minimizes camera shake and blur caused by hand movement or low light. This advanced system compensates for horizontal and vertical shift, as well as other forms of camera motion, ensuring sharper images and smoother videos. The VR technology is particularly effective when using the 36x zoom lens, helping to maintain clarity even at maximum magnification. By reducing the impact of camera shake, the Five-Way VR system enhances overall image quality, making it ideal for capturing crisp photos and stable footage in various shooting conditions.
Basic Operation of the Nikon COOLPIX P500
This chapter covers the fundamental steps to start using your camera, including power-on, mode selection, basic shooting modes, and navigating the intuitive menu system effectively.
3.1 Getting Started with the Camera
Unbox your Nikon COOLPIX P500 and ensure all accessories, including the battery, charger, and memory card, are included. Charge the battery fully using the provided charger. Insert the battery into the camera, ensuring it is securely locked. Next, insert a compatible memory card into the card slot. Power on the camera by pressing the power button. Familiarize yourself with the camera’s buttons and controls. Navigate through the setup menu to configure date, time, and language settings. Refer to the manual for detailed instructions on initial setup and operation.
3.2 Understanding the Mode Dial
The mode dial on the Nikon COOLPIX P500 allows you to switch between shooting modes easily. Common modes include Auto, Scene, Night Portrait, and Movie Mode. Auto Mode is ideal for beginners, while Scene Modes offer preset settings for specific situations like landscapes or portraits. Turn the dial to select your preferred mode, then use the menu system to adjust settings as needed. Refer to the manual for detailed explanations of each mode and its best use cases to maximize your camera’s functionality. Experiment with different modes to explore creative possibilities.
3.3 Basic Shooting Modes
The Nikon COOLPIX P500 offers several basic shooting modes designed to simplify photography. Auto Mode adjusts settings automatically for quick, hassle-free shots. Scene Auto Selector detects the scene and optimizes settings accordingly. Night Landscape Mode captures clear images in low light, while Portrait Mode emphasizes subject focus with a blurred background. Sports Mode freezes fast-moving subjects, and Close-up Mode enhances details in macro shots. These modes allow you to concentrate on composition while the camera handles technical aspects, ensuring high-quality results in various conditions. Explore these modes to enhance your photography experience effectively.
3.4 Navigating the Menu System
The Nikon COOLPIX P500’s menu system is intuitive and user-friendly, allowing easy access to various camera settings. Press the Menu button to enter the main menu, where you can navigate using the multi-selector. The Shooting Menu adjusts settings like image quality and white balance, while the Playback Menu manages image review and editing. The Setup Menu handles camera configuration, such as date/time and language. Custom Settings enable personalization of camera shortcuts and autofocus options. Use the OK button to select options and the Zoom control to scroll through pages. This system ensures quick and efficient customization of your camera settings to suit your needs effectively.
Advanced Shooting Modes
Explore Manual (M), Aperture Priority (A), and Shutter Priority (S) modes for creative control. Scene Modes and advanced autofocus options enhance versatility, ensuring optimal results in various shooting conditions.
4.1 Manual Mode (M)
In Manual Mode, you gain full control over aperture, shutter speed, and ISO settings, allowing for precise adjustments to capture your creative vision. The camera’s metering system provides guidance, but you dictate exposure. Access Manual Mode via the mode dial. Adjust settings using the command dials. Live Preview helps you see changes in real-time. Custom White Balance and focus options further refine your shots. Experiment with lighting and composition to achieve unique results. This mode is ideal for experienced photographers seeking absolute control over their images.
4.2 Aperture Priority Mode (A)
In Aperture Priority Mode, you set the aperture, and the camera automatically adjusts the shutter speed for optimal exposure. This mode is ideal for controlling depth of field—use a larger aperture (lower f-stop) for a shallower focus or a smaller aperture (higher f-stop) for greater depth. Access this mode via the mode dial. Adjust the aperture using the command dial. The camera’s metering system ensures balanced exposure. This mode is perfect for portraits, landscapes, and situations where depth of field control is crucial. Experiment with different apertures to achieve your desired effect.
4.3 Shutter Priority Mode (S)
Shutter Priority Mode allows you to set the shutter speed, with the camera automatically adjusting the aperture for proper exposure. This mode is excellent for capturing motion—use faster speeds to freeze action or slower speeds for creative blur. Access it via the mode dial and adjust the shutter speed with the command dial. The camera’s metering system ensures balanced exposure. Ideal for sports, low-light situations, or artistic effects like motion blur. Experiment with different speeds to achieve your desired results, whether freezing fast-moving subjects or creating dynamic, blurred effects.
4.4 Scene Modes
Scene Modes optimize camera settings for specific shooting scenarios. Choose from options like Portrait, Landscape, Night Portrait, and more. Each mode adjusts aperture, shutter speed, and ISO for ideal results. Portrait mode sharpens faces, while Landscape enhances colors and details. Night modes reduce noise for low-light clarity. Select Scene Modes via the menu or mode dial for tailored photography. These presets simplify capturing stunning images without manual adjustments, ensuring great results in various conditions. Experiment with different modes to enhance your creativity and achieve professional-looking photos effortlessly.
4.5 Autofocus and Metering Modes
The Nikon COOLPIX P500 offers advanced autofocus and metering modes for precise control. Autofocus modes include Single AF for stationary subjects and Continuous AF for moving objects, while Face-Priority AF ensures sharp portraits. Metering modes like Matrix, Center-Weighted, and Spot optimize exposure in various lighting conditions. These modes enable you to capture sharp, well-exposed images with ease, enhancing your photography experience with clarity and detail.
Menu Functions
The Nikon COOLPIX P500 menu system offers intuitive navigation, providing access to shooting, playback, setup, and custom settings to tailor your camera experience to your needs.
5.1 Shooting Menu
The Shooting Menu on the Nikon COOLPIX P500 allows users to adjust settings crucial for capturing images. Options include selecting image size and quality, adjusting white balance, and configuring ISO sensitivity. Additionally, noise reduction settings and AF-area modes can be customized to suit various shooting conditions. This menu is essential for optimizing image quality and ensuring desired results in different photography scenarios, providing a comprehensive toolset for photographers to refine their shots effectively.
5.2 Playback Menu
The Playback Menu on the Nikon COOLPIX P500 offers tools for reviewing and managing your images. Features include deleting unwanted photos, rotating images, and setting up slideshows. You can also protect files to prevent accidental deletion, zoom in on images to check details, and view histograms for exposure analysis. Additional options like printing marks and image copy functions are available, allowing you to organize and enhance your photos directly on the camera, making post-capture management efficient and convenient.
5.3 Setup Menu
The Setup Menu on the Nikon COOLPIX P500 allows you to customize camera settings for a personalized experience. Options include adjusting the date and time, selecting language preferences, and enabling or disabling auto shutdown. You can also format memory cards, reset settings to factory defaults, and adjust monitor brightness. Additional features like setting the camera’s time zone and enabling or disabling GPS location tagging are available. These settings ensure your camera is tailored to your preferences, optimizing performance and convenience for all your photography needs.
5.4 Custom Settings
The Custom Settings menu on the Nikon COOLPIX P500 allows you to tailor camera functions to your preferences. Options include adjusting autofocus modes, metering modes, and white balance settings for precise control. You can also customize ISO sensitivity, noise reduction levels, and image sharpening to suit your shooting style. Additionally, the menu provides options for saving frequently used settings for quick access. These customization features enable you to optimize the camera’s performance for your specific needs, ensuring a more personalized and efficient photography experience.
5.5 Recent Settings
The Recent Settings feature on the Nikon COOLPIX P500 allows quick access to the most recently adjusted menu options. This convenient function streamlines navigation by displaying up to 10 of your last-used settings, enabling efficient adjustments during shooting sessions. By reducing the need to scroll through multiple menus, Recent Settings enhances productivity and ensures you can focus on capturing the perfect shot without missing moments. This feature is particularly useful for photographers who frequently tweak camera settings to adapt to changing conditions.

Custom Settings and Personalization
Customize your Nikon COOLPIX P500 to suit your photography style. Explore personalized settings for shortcuts, autofocus, white balance, and more to enhance your shooting experience and creativity.
6.1 Customizing Camera Shortcuts
Customize your Nikon COOLPIX P500 by assigning frequently used functions to camera buttons. This enhances efficiency and personalizes your shooting experience. Users can assign functions like ISO, white balance, or autofocus modes to specific buttons, such as the Fn button, for quick access. The customization options allow you to tailor the camera to your workflow, ensuring that your most-used settings are readily available. This feature is particularly useful for photographers who prefer a streamlined and intuitive interface. Access these settings through the menu system to optimize your camera’s functionality to your preferences.
6.2 Adjusting Autofocus Settings
The Nikon COOLPIX P500 offers customizable autofocus settings to enhance your photography experience. Users can adjust autofocus modes, such as Single AF, Continuous AF, or Manual Focus, depending on the subject. The camera also features focus area selection, allowing you to choose from options like Face Priority, Auto, or Manual. These settings can be accessed through the camera’s menu system, enabling precise control over focus acquisition. Customizing autofocus settings ensures sharper images and improved performance in various shooting conditions, making it easier to capture the perfect shot every time.
6.3 Configuring White Balance and ISO Settings
The Nikon COOLPIX P500 allows users to configure White Balance and ISO settings for optimal image quality. White Balance adjusts color temperature to match lighting conditions, with options like Auto, Daylight, Fluorescent, and Cloudy. ISO settings control sensitivity, ranging from 100 to 6400, with lower values suitable for bright light and higher values for low-light conditions. These settings can be accessed via the camera’s menu system, enabling customization to achieve accurate colors and reduce noise in various shooting environments. Proper configuration enhances image clarity and ensures vibrant, natural-looking results.
6.4 Managing Noise Reduction and Image Sharpening
The Nikon COOLPIX P500 offers customizable Noise Reduction and Image Sharpening settings to refine image quality. Noise Reduction minimizes grain in low-light photos, while Image Sharpening enhances detail clarity. These settings are accessible via the camera’s menu system, allowing adjustments to suit personal preference. Lower noise reduction preserves natural texture, while higher settings smooth out grain but may soften details. Similarly, sharpening can be fine-tuned to prevent over-sharpening artifacts. Balancing these settings ensures crisp, clear images with minimal noise, especially in challenging lighting conditions.

Troubleshooting Common Issues
Troubleshooting common issues with the Nikon COOLPIX P500 involves identifying and resolving errors like mode dial malfunctions or USB connection problems. Refer to the manual for solutions.
7.1 Resolving Mode Dial Malfunctions
If the mode dial on your Nikon COOLPIX P500 is not functioning properly, ensure it is in the correct position. Turn off the camera, then gently rotate the dial to align it with the desired mode. If the issue persists, reset the camera by removing the battery for 30 seconds. If problems remain, refer to the manual or contact Nikon support for further assistance. Regularly cleaning the dial and ensuring proper handling can prevent malfunctions.
7.2 Fixing USB Connection Problems
If your Nikon COOLPIX P500 fails to connect via USB, ensure the cable is securely plugged into both the camera and the computer. Use the provided USB cable or a compatible alternative. Check the camera’s USB mode in the menu, selecting “Mass Storage” or “PTP” for proper recognition. Restart both devices and try a different USB port. If issues persist, reinstall the camera drivers or update the firmware. Consult the manual or Nikon support for further assistance to resolve connectivity problems effectively.
7.3 Addressing Image Quality Issues
If images appear blurry, grainy, or poorly focused, check the camera settings. Ensure autofocus is enabled and properly configured. Low light conditions may require adjusting ISO sensitivity or using the flash. Clean the lens and sensor to remove dirt or smudges that might affect image clarity. Use the Five-Way Vibration Reduction (VR) Image Stabilization to minimize camera shake. If issues persist, reset the camera to default settings or update the firmware. Consult the manual for advanced troubleshooting or contact Nikon support for professional assistance to resolve image quality concerns effectively.
7.4 Solving Memory Card Errors
If your Nikon COOLPIX P500 displays memory card errors, start by formatting the card in the camera settings. Ensure the card is compatible with the camera and free from physical damage. Check for card errors using a computer or card reader and format it if necessary. Always insert the card correctly, and avoid removing it during write operations. If issues persist, try using a different memory card or reset the camera to default settings. For unresolved errors, refer to the manual or contact Nikon support for further assistance to resolve memory card-related problems effectively.
Maintenance and Care
Regular maintenance ensures optimal performance. Clean the lens and camera body with soft cloths, update firmware, and store in a dry, cool place. Replace batteries as needed.
8.1 Cleaning the Camera and Lens
Regular cleaning is essential to maintain your Nikon COOLPIX P500’s performance. Use a soft, dry cloth to wipe the camera body and lens. For stubborn smudges, dampen a clean cloth with water, but avoid harsh chemicals or liquids. Gently rub the lens in circular motions, then dry it immediately. Avoid touching the lens surface to prevent fingerprints. Compressed air can be used to remove dust from the camera body. Store the camera in a protective case when not in use to minimize exposure to dust and moisture. Always handle the camera by the edges to reduce smudging. Never use tissues or paper towels, as they may scratch the lens. For tough stains, consider professional cleaning services. Regular maintenance ensures clear images and optimal functionality.
8.2 Updating Firmware
Updating the firmware on your Nikon COOLPIX P500 ensures optimal performance and access to the latest features. Visit Nikon’s official website to check for the newest firmware version. Download the update to your computer, then connect the camera via USB. Follow the on-screen instructions to complete the installation. Do not disconnect the camera during the update process, as this may cause malfunctions. Once done, restart the camera to apply the changes. Refer to the manual for detailed step-by-step guidance to ensure a smooth firmware update process.
8.3 Storing the Camera Properly
To maintain the Nikon COOLPIX P500’s condition, store it in a cool, dry place away from direct sunlight and moisture. Use a protective case to prevent scratches and dust accumulation. Remove the battery when storing for extended periods to avoid corrosion. Clean the camera and lens thoroughly before storage. Avoid extreme temperatures and humidity, which can damage internal components. For long-term storage, consider using silica gel packets to absorb moisture. Always follow the manual’s guidelines to ensure the camera remains in optimal condition when not in use.
8;4 Battery Maintenance Tips
To ensure optimal performance and longevity of the Nikon COOLPIX P500’s battery, follow these tips: Avoid overcharging, as it can reduce battery life. Use the supplied charger and avoid third-party adapters. Clean the battery terminals regularly with a soft cloth to maintain proper connections. Store batteries in a cool, dry place when not in use. If storing for extended periods, charge the battery to 50% capacity to prevent degradation. Replace the battery if it no longer holds a charge or shows signs of swelling or corrosion. Always follow the manual’s guidelines for proper care.
Accessories and Compatibility
The Nikon COOLPIX P500 supports various accessories, including compatible memory cards, lenses, and adapters. External flashes and software enhance functionality, ensuring optimal performance and versatility for photographers.
9.1 Recommended Memory Cards
For optimal performance, use compatible SD, SDHC, or SDXC memory cards with the Nikon COOLPIX P500. Cards with a minimum Class 6 rating are recommended for smooth operation. A 4GB to 64GB capacity is ideal for storing high-resolution images and videos. Avoid using non-recommended cards, as they may cause compatibility issues. Always format memory cards in the camera before use to ensure proper function. Using high-quality cards from trusted brands will help prevent data loss and ensure reliable performance during photography sessions.
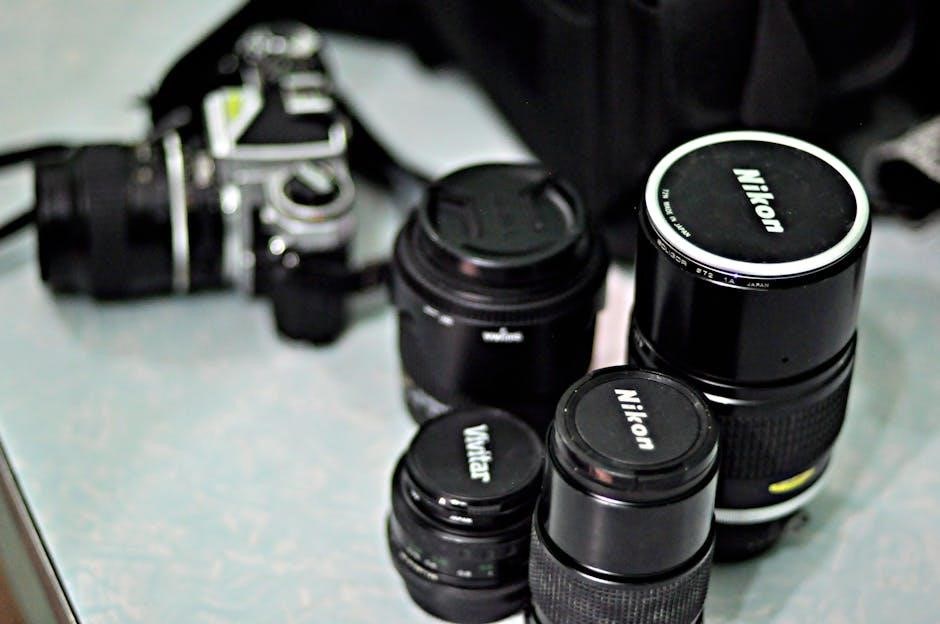
9.2 Compatible Lenses and Adapters
The Nikon COOLPIX P500 features a built-in 36x NIKKOR zoom lens, covering wide-angle to super-telephoto ranges. While the primary lens is non-interchangeable, optional adapters and converters can enhance functionality. Use Nikon-approved adapters for compatibility and optimal performance. Telephoto and wide-angle converters are available to extend zoom capabilities. Ensure all accessories are Nikon-certified to maintain image quality and camera functionality. For more details on compatible lenses and adapters, refer to the official Nikon accessories list in the manual or visit the Nikon website for verified options.
9.3 External Flash and Accessories
The Nikon COOLPIX P500 supports external flash units for enhanced lighting control. Compatible flashes include the Nikon Speedlight SB-400 and SB-700, offering improved illumination in low-light conditions. Additional accessories like remote controllers and camera cases are available to customize your setup. Ensure all external devices are Nikon-certified for optimal performance. Using genuine Nikon accessories guarantees compatibility and maintains image quality. For a full list of compatible external flash and accessories, consult the manual or visit the official Nikon website for verified options.
9.4 Software and Connectivity Options
The Nikon COOLPIX P500 is compatible with various software solutions, including Nikon Transfer 2 and View NX 2, for seamless image transfer and editing. Connectivity options include USB 2.0 Hi-Speed for quick data transfer to computers and HDMI output for viewing images on HD displays. The camera also supports firmware updates via Nikon’s software suite. Ensure you use Nikon-approved software and accessories for optimal performance. Regularly updating your camera’s firmware and software ensures compatibility and enhances functionality. Visit the Nikon website for the latest software and connectivity tools tailored for your COOLPIX P500.
This concludes the Nikon COOLPIX P500 Owner’s Manual. By mastering its features, shooting modes, and customization options, you’ll unlock your camera’s full potential for stunning photography.
10.1 Summary of Key Takeaways
The Nikon COOLPIX P500 Owner’s Manual provides a comprehensive guide to unlocking your camera’s potential. Key features include a 36x NIKKOR zoom lens, 12.1 MP sensor, and advanced image stabilization. Mastering shooting modes, from automatic to manual, enhances creativity. Customization options allow personalized settings for optimal performance. Regular maintenance, such as cleaning and firmware updates, ensures longevity. Troubleshooting common issues and understanding menu functions empowers users to resolve problems efficiently. By exploring these features and techniques, photographers can capture stunning images with ease and precision, making the most of their COOLPIX P500.
10.2 Final Tips for Optimizing Camera Performance
To maximize your Nikon COOLPIX P500’s performance, regularly update firmware and clean the lens for optimal image quality. Experiment with shooting modes and customize settings to suit your style. Use the 36x zoom strategically for crisp close-ups and wide-angle shots. Store the camera properly to maintain functionality and longevity. Familiarize yourself with the menu system and shortcuts for efficient operation. Lastly, consider using a tripod for stability in low-light conditions and explore compatible accessories to enhance your photography experience.